Using SSLFP Authentication on Cuff-Link
Published: By geannie Category: IRC Tags: Chat Features CL Services HexChat SSLFP Technical Help Tutorial irc #help supportThis post details how to use SSLFP authentication on Cuff-Link. This particular method of authentication is nice for a couple of reasons, but the main one is that you don’t authenticate with a password, but rather an SSL certificate. This works in both mIRC and HexChat.
Please note: You must use an SSL connection (port +6697) in order for the fingerprint to work.
One of the advantages you’ll gain using this method in HexChat is that you can set NickServ to use immediate kill protection. Unfortunately, because mIRC does not support the external cert option, you cannot use kill immed in conjunction SSLFP. If you want to have immediate kill support in mIRC, please use SASL instead. instructions on how to use SASL in mIRC can be found here.
Certificate Generation
To get started with using SSLFP, you must first create an SSL certificate. To do this you can either use a service which signs certificates or you can make your own self-signed cert. To make your own, you will need to have access to a UNIX based operating system such as some flavour of Linux or BSD with openssl installed. Get logged in, and issue the following command:
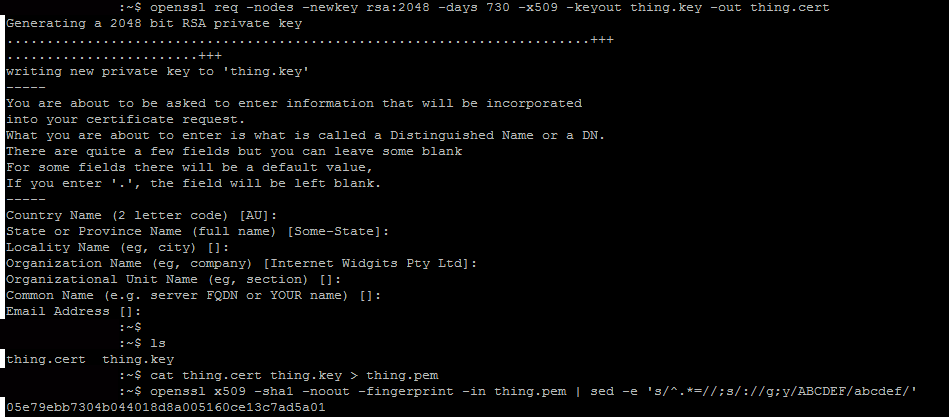
openssl req -nodes -newkey rsa:2048 -days 730 -x509 -keyout thing.key -out thing.cert
Fill in the information as prompted, then issue the ls command. You will see two new files. One is thing.cert and the other is thing.key. Next, issue this command:
cat thing.cert thing.key > thing.pem
Then:
openssl x509 -sha1 -noout -fingerprint -in thing.pem | sed -e 's/^.*=//;s/://g;y/ABCDEF/abcdef/'
It will output something that looks like this:
05e79ebb7304b044018d8a005160ce13c7ad5a01
This is your fingerprint, which you will need to add to NickServ during the appropriate step.
Note: You can also see the fingerprint by /whois yournick after you’ve installed it correctly.
In *nix/*BSD, you can just copy the pem files to the appropriate HexChat directory using the cp command – typically, this will be ~/.config/hexchat/certs. Note: the certs directory is not created by default. You will have to mkdir ~/.config/hexchat/certs
If you dual boot, you can copy them directly from the *nix partition to the Windows partition. For Windows, if you have to generate remotely on a server, you will need to save (download) the files to your local computer into the appropriate directory, depending on whether you’re using mIRC or HexChat. In our example, we’ve called it “thing.pem”. You can call it whatever you want, just don’t put spaces in:
mIRC SSLFP Setup
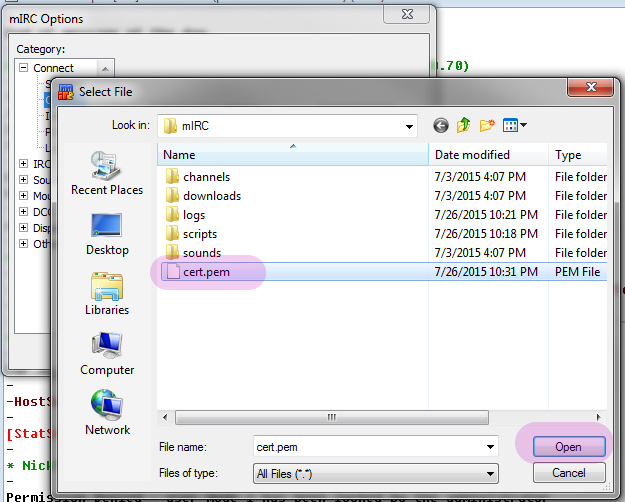
In Windows save your .pem into the mIRC settings folder, which should be found at C:\Users\[youruser]\AppData\roaming\mIRC
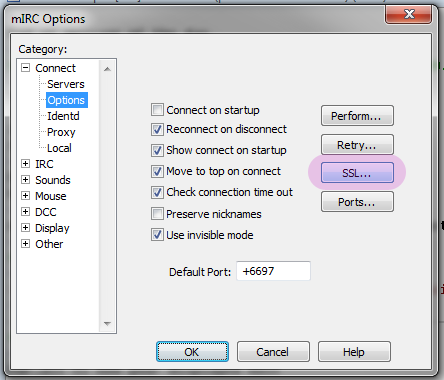
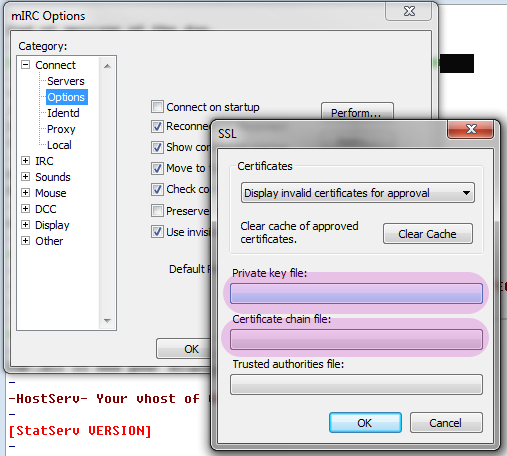
Open mIRC and open up the mIRC Options dialogue. Click on “Options” in the tree under “Connect”, and click on “SSL…”
- Connect to the network, and identify as normal using /ns identify yourpassword. Check in the connect dialogue to make sure mIRC attempted to use the certificate. If it didn’t, go back and check the previous steps or come see us in #help. Once connected and identified, issue the following command with your fingerprint in place of the example:


If successfully added, you should see a message like this:

Disconnect from the network and reconnect. If the certificate and fingerprint are working properly, you will see the following message in the connect dialogue:
While you cannot use kill immediately protection with an SSLFP in mIRC, you can take advantage of the kill quick (you can use this with any automatic services authentication method or if you are quick with typing), which gives you about 20 seconds to enter your password. This can be turned on by issuing the following command:
/ns set kill quick
HexChat SSLFP setup
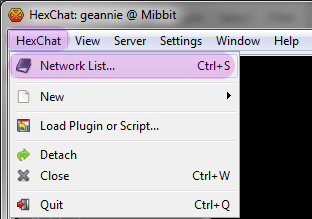
- Open up your Network List from the HexChat menu or Ctrl+S, and make note of the name you gave Cuff-Link. In this case, we put in Cuff-Link-2.
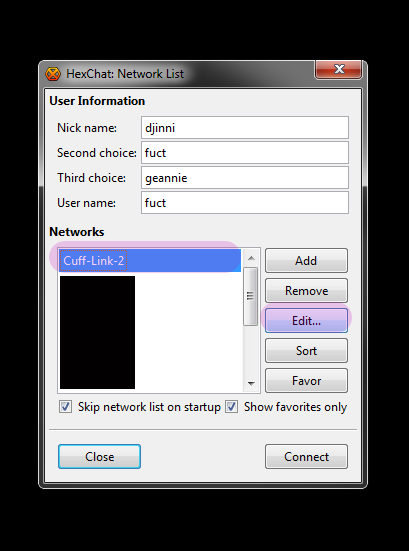
![Make sure your account name [this is your NickServ account] is in the “User Name” field, then select SASL External (cert) from the Login method dropdown.](/wp-content/uploads/2015/07/92.png)
- Copy your .pem file into the appropriate directory:
*nix
cp path/to/your/cert/thing.pem /home/youruser/.config/hexchat/nameforcl.pem
In our example, this would be:
cp path/to/your/cert/thing.pem /home/youruser/.config/hexchat/Cuff-Link-2.pem
Please remember that *nix is CASE SENSITIVE, so if you called the network Cuff-Link-2 in HexChat, your .pem cannot be cuff-LINK-2.pem.
Windows Navigate to C:\Users\[youruser]\AppData\Roaming\HexChat\ and create a folder called “certs”. Then copy your thing.pem file into the certs directory [C:\Users\[youruser]\AppData\Roaming\HexChat\certs], and rename it to whatever you called Cuff-Link. In this case, the .pem is “Cuff-Link-2.pem”.
- Connect to Cuff-Link. Look in your connect dialogue for lines indicating that HexChat is trying to use the cert. It should tell you that authentication was unsuccessful, because the next step hasn’t been done yet. Get your fingerprint from the certificate generation, and issue the following command:
/ns cert add [yourfingerprint] like so:

You will receive a notice like this if the fingerprint was successfully added to NickServ:

- Close the current connection, and reconnect to Cuff-Link. You should see the following two messages (with your nick, of course) in your connect scroll:

- If you wish to take advantage of the “kill immediately” nick protection once you have the SSLFP authenticating properly, issue the following command:
/ns set kill immed
This will immediately Cuff#### anyone who tries to use your nick. Please be aware that if you use the same NickServ account on multiple devices, you are going to have to set up SASL on all of them to use this option.