Tutorial - Using AndroIRC with SASL on Cuff-Link
Published: By ClAdmin Category: Help Files, IRC Tags: AndroIRC IRC Technical Help TutorialWe’re working to create tutorials for various clients with SASL capabilities for additional security, both yours and ours. Many of you who use Cuff-Link use AndroIRC as your preferred mobile client, and it has built-in SASL capabilities – why not use the added layer of security? Simply explained, SASL is the process of logging into NickServ during the connect process which enables other features such as immediate vhost application, joins based on authentication [such as exceptions], and best of all, immediate kill protection.
AndroIRC is available at the google play store at https://play.google.com/store/apps/details?id=com.androirc There is a paid version available, however the only ad shown on the free version is on the initial splash screen [first image].
- Now to the setup! Taking a few minutes here to become familiar with the options and set up the network and your nick makes chatting on mobile much easier. First thing first, tap the menu key or the 3 dots icon on the top right, then settings:
[caption id=“attachment_232” align=“aligncenter” width=“169”]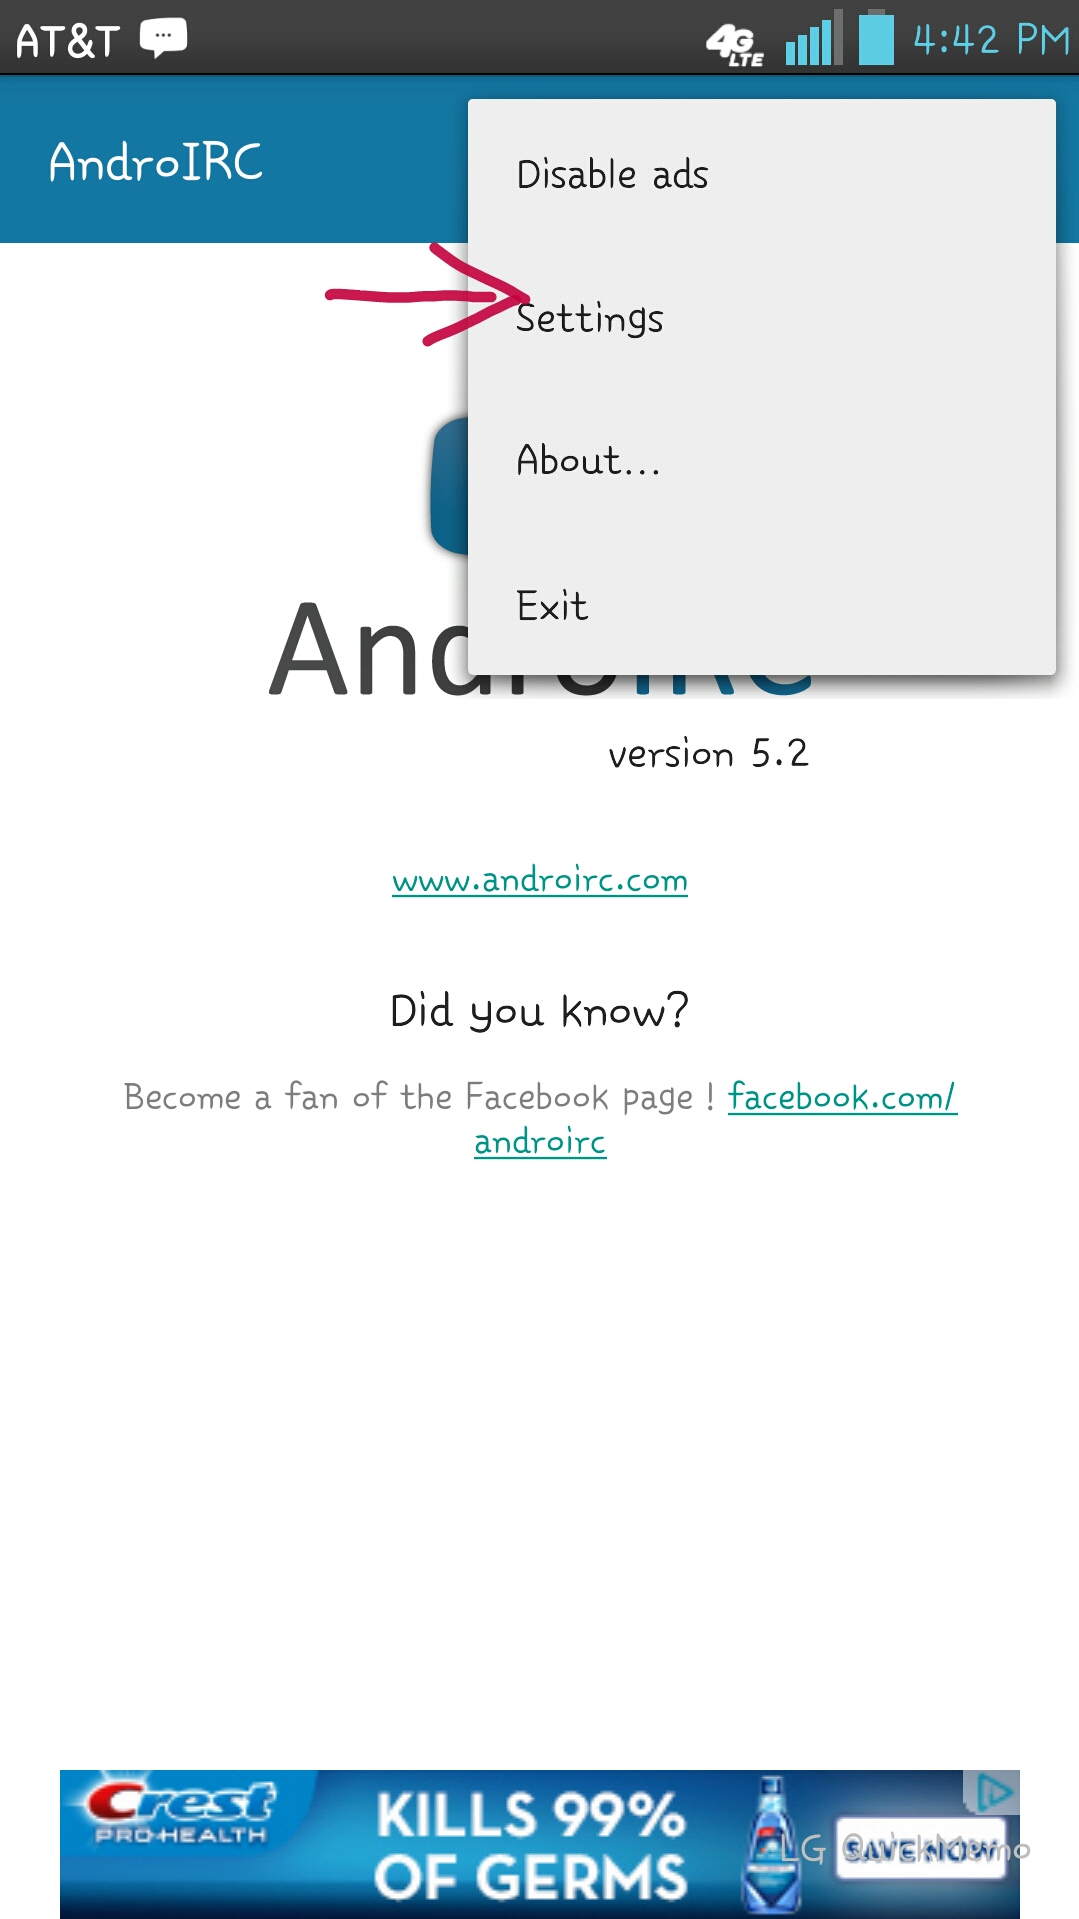 Tap on “Settings”[/caption]
- The first thing to edit is the default and alternate nicknames. Tap on Nickname and then Nickname to fill in your preferred nick, hit OK, then tap Alternative to fill in your second nick choice and hit OK. Alternative nicks are suggested to be grouped with your main nick, and they are handy when using mobile and bouncing between wifi and mobile connections.
[caption id=“attachment_231” align=“aligncenter” width=“169”]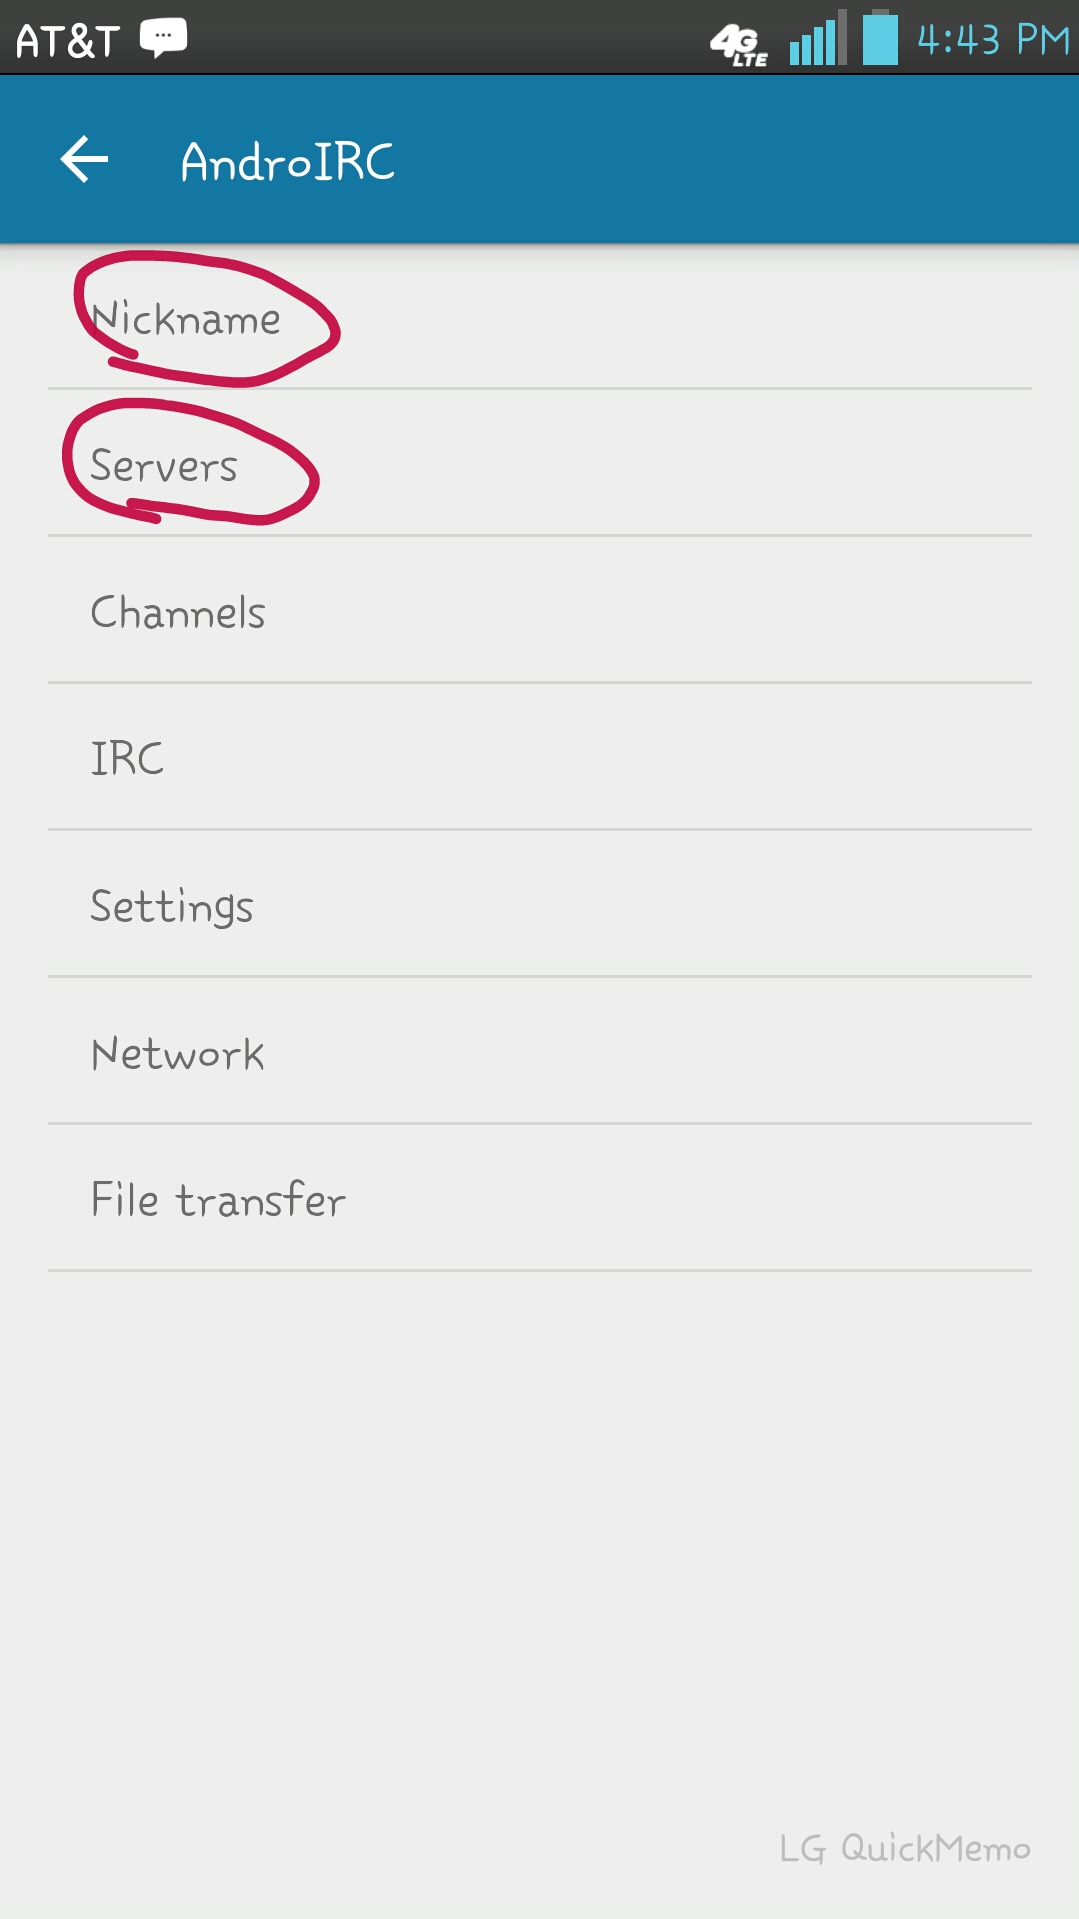 Nicknames and Servers[/caption]
- Tap the back arrow to go back to the main setting screen [shown above] and we’ll head into Servers next. It’ll look like the next image, which are the default servers AndroIRC comes with; tap menu and “New Server” to add our own.
[caption id=“attachment_230” align=“aligncenter” width=“169”]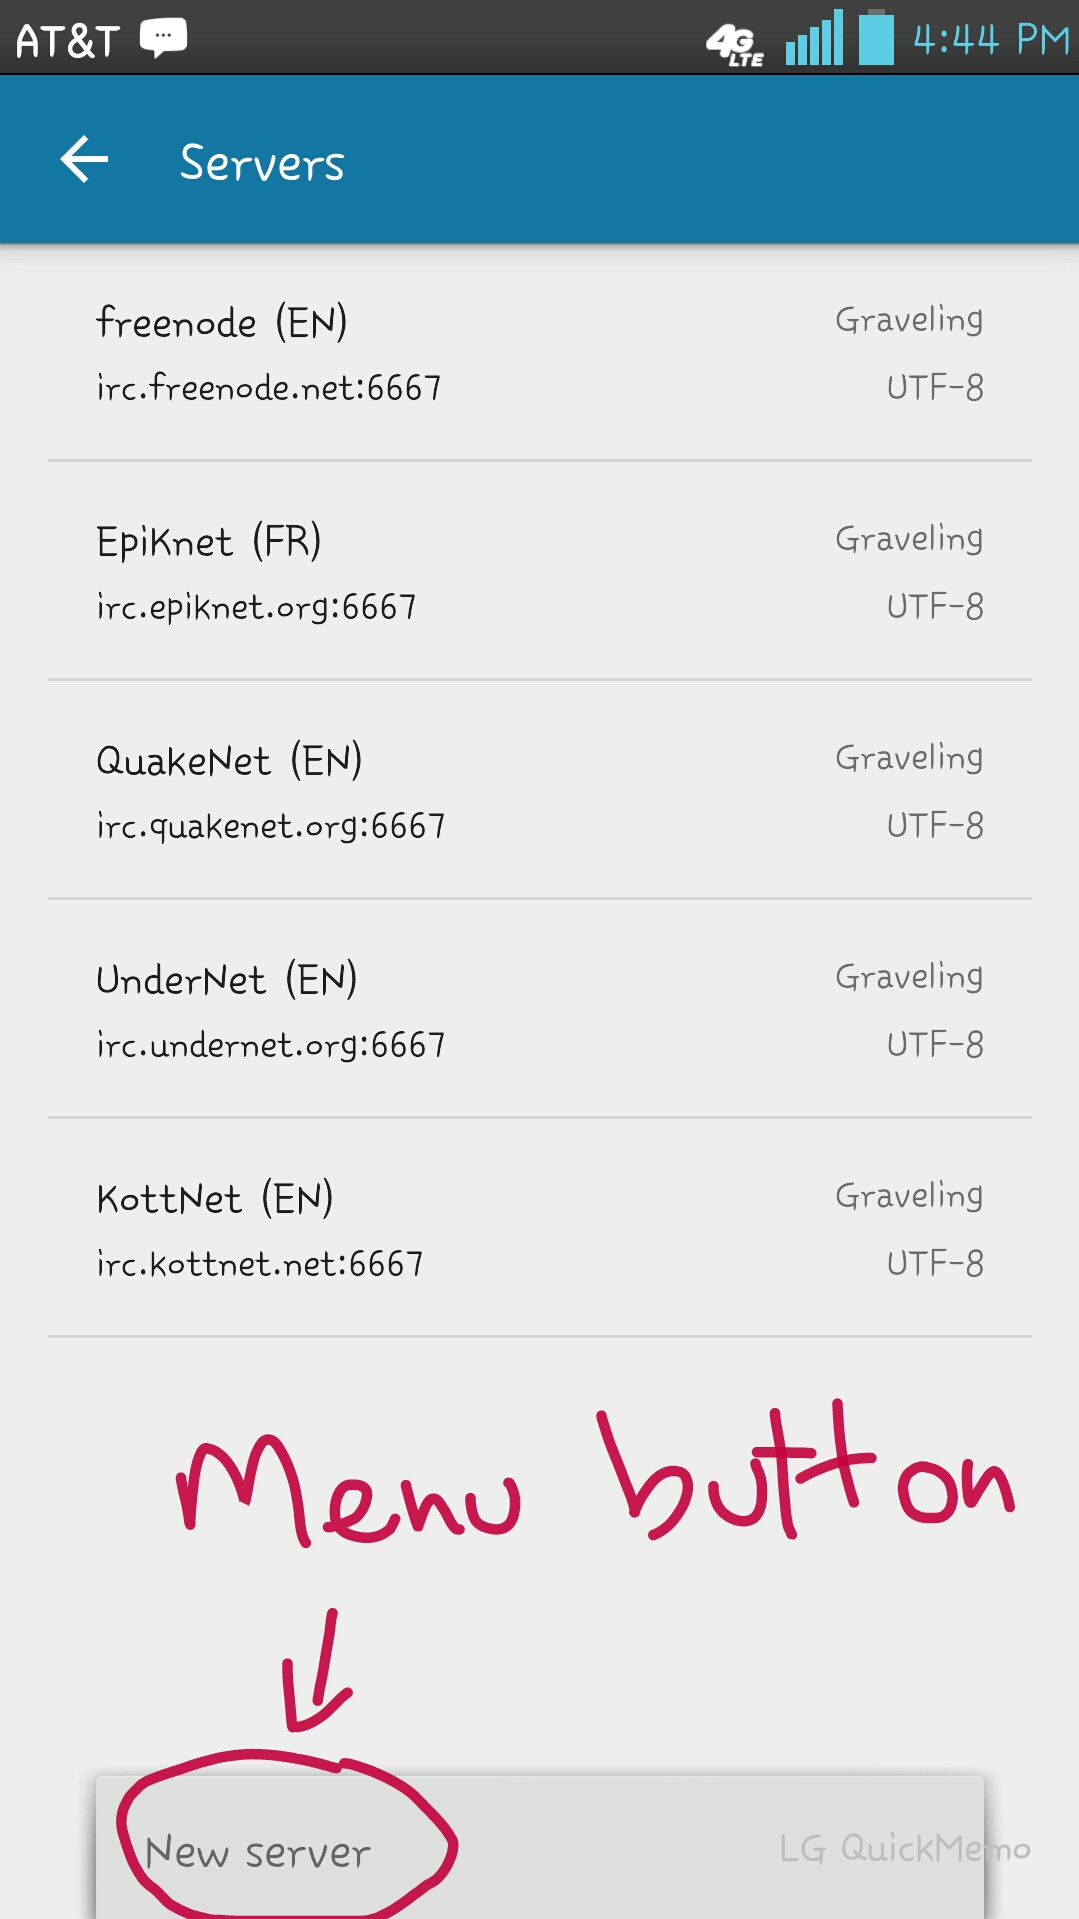 Add a Server[/caption]
- From the New Server menu, there are a few things we’ll be editing here:
[caption id=“attachment_229” align=“aligncenter” width=“169”]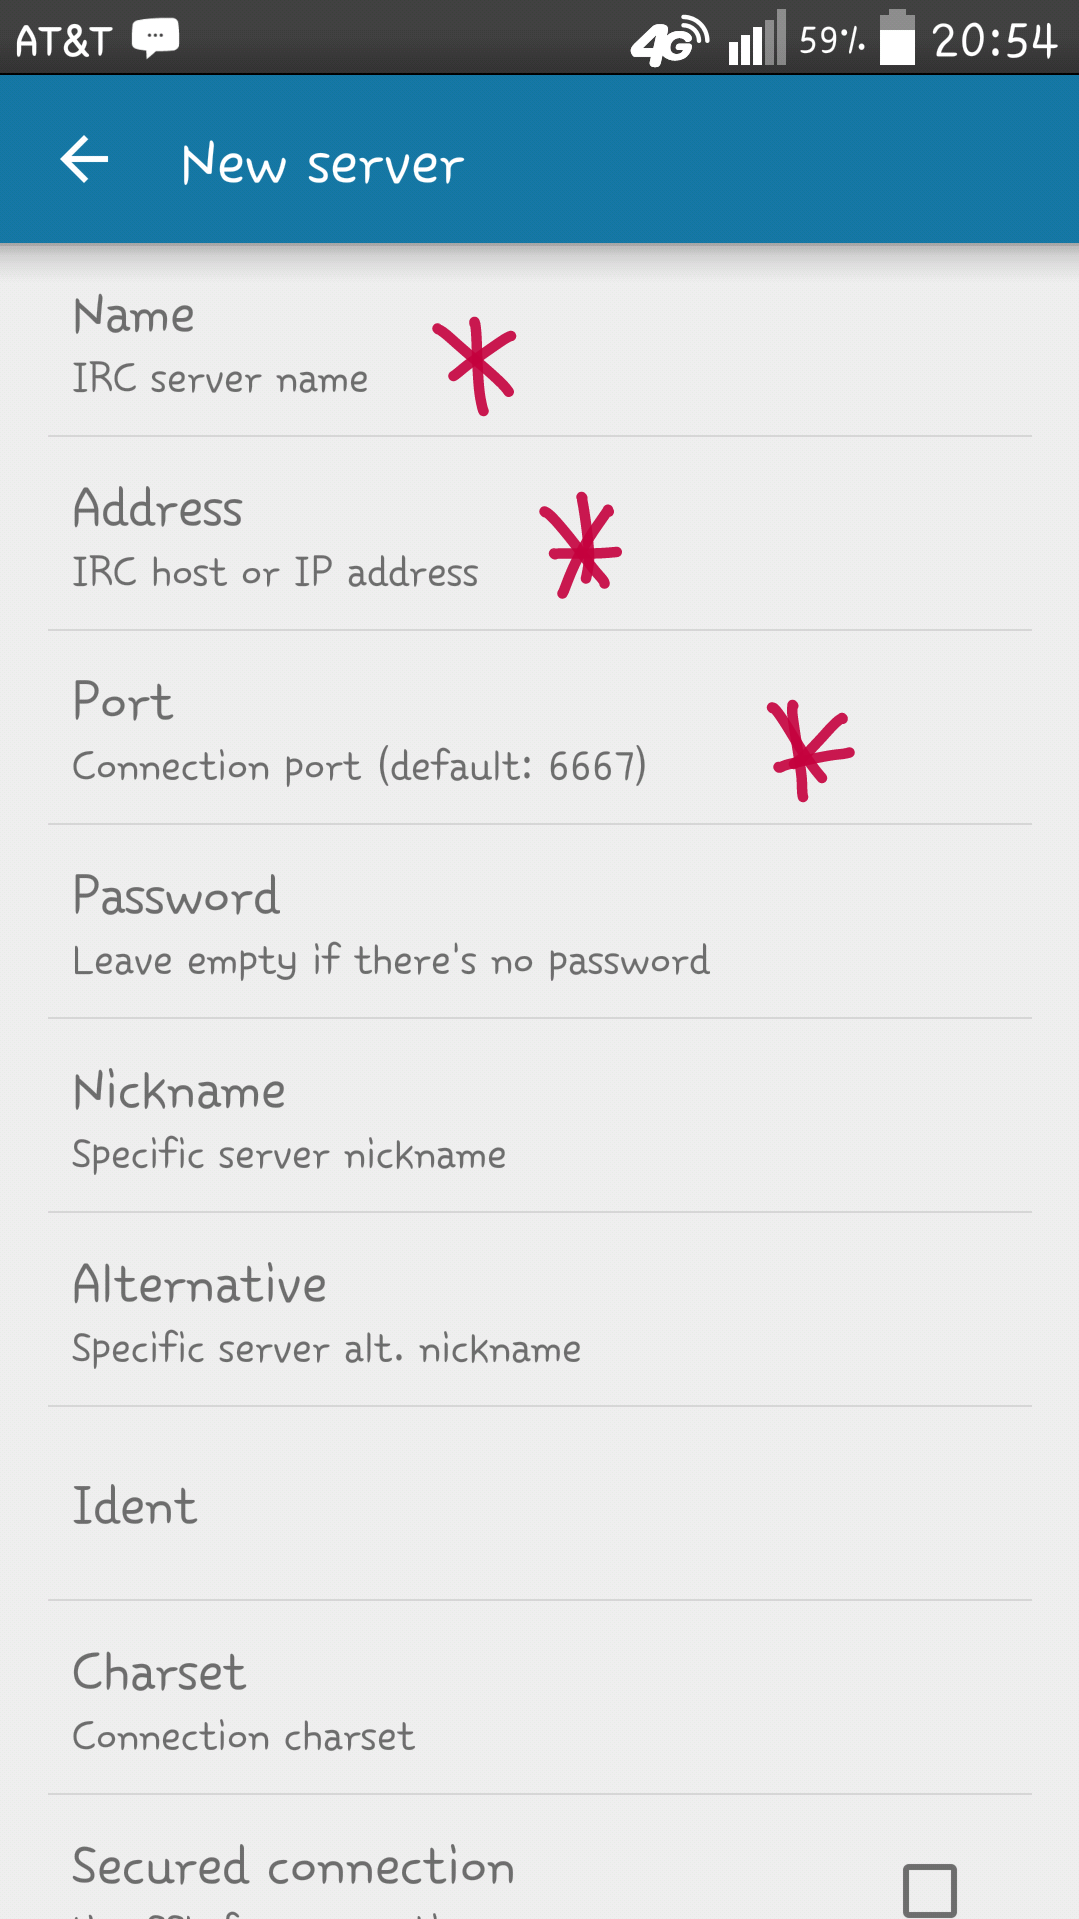 Server Options[/caption]
- Name: This is name of the server in the list, i.e. Cuff-Link
- Address: irc.cuff-link.me
- Regular SSL Port: 6697
- Auth/bypass SSL Port: 7797.
- Secured Connection: Check this box to use in conjunction with port 6697.
- Scroll down a bit to the next part:
[caption id=“attachment_227” align=“aligncenter” width=“169”]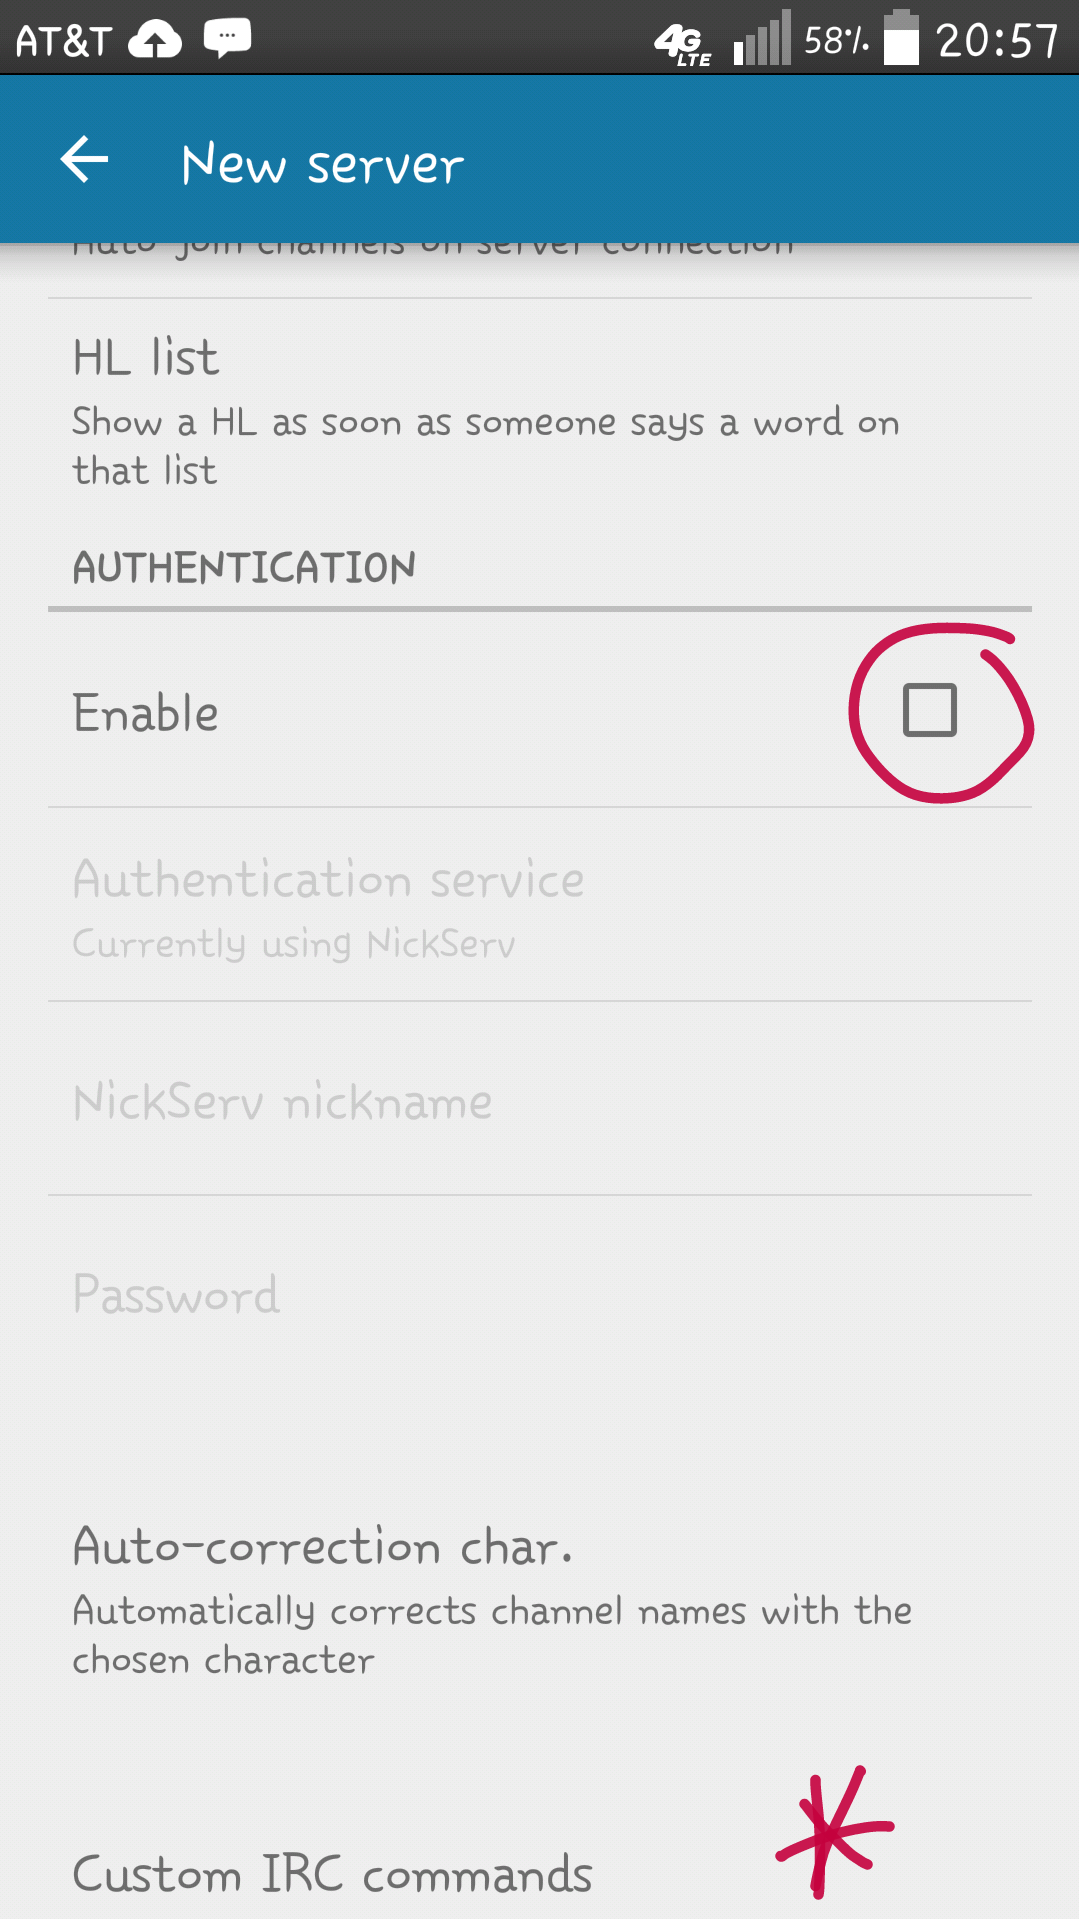 Server Options 2[/caption]
6. Important! Check the Enable box beneath “AUTHENTICATION” to bring up the next set of options:
[caption id=“attachment_235” align=“aligncenter” width=“169”]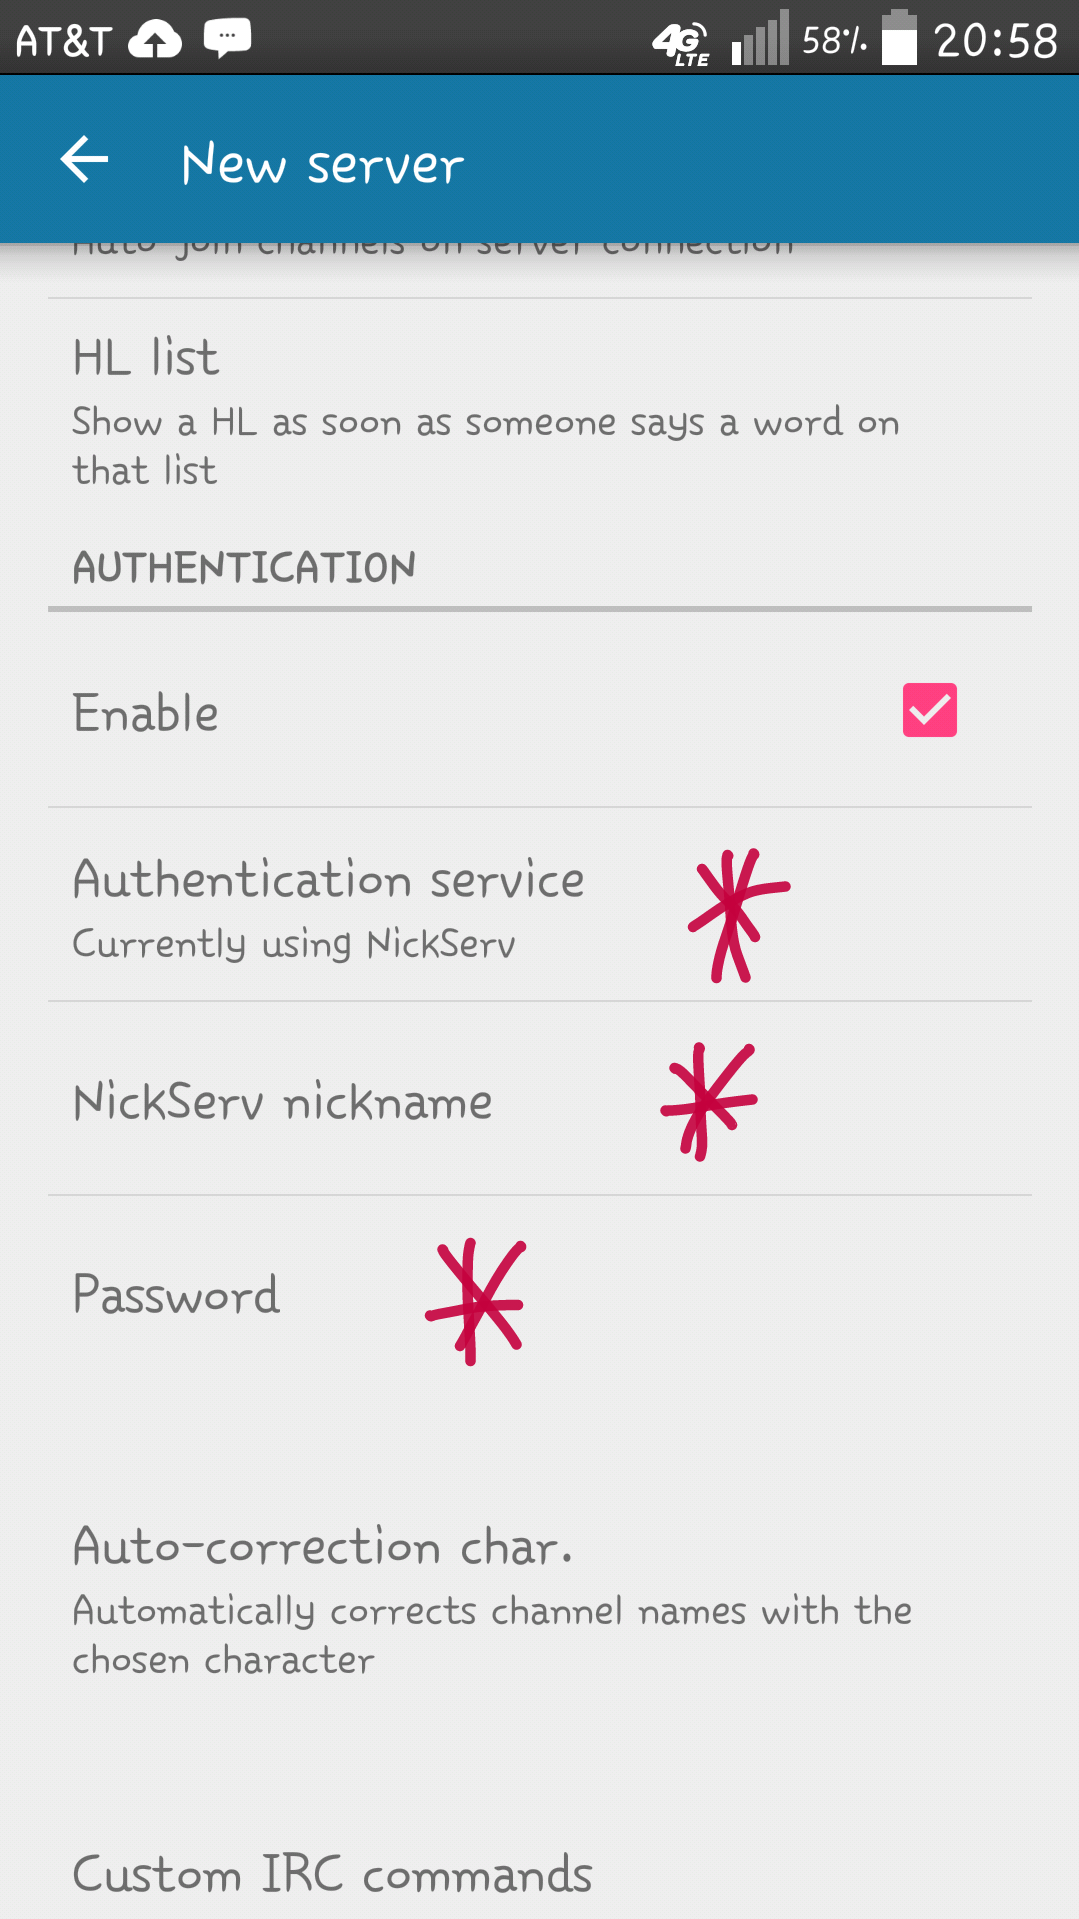 Server Options 3 - Enable AUTHENTICATION![/caption]
- Authentication Service: Tap to change to SASL
- Authentication type: DH-BLOWFISH is considered antiquated, using PLAIN with an SSL connection is considered sufficient.
- Username: Fill in your main nick here [note: must be a registered nickname, does not have to be the one in use]
- Password: Fill in your nickserv password here
After all that, tap back to save the server. This part is optional, but if you have autojoin channels to add, you can go to the Channels section, tap the server, then menu and “add channel”.
- Now for some of the finer settings, go to the Settings menu:
[caption id=“attachment_234” align=“aligncenter” width=“169”]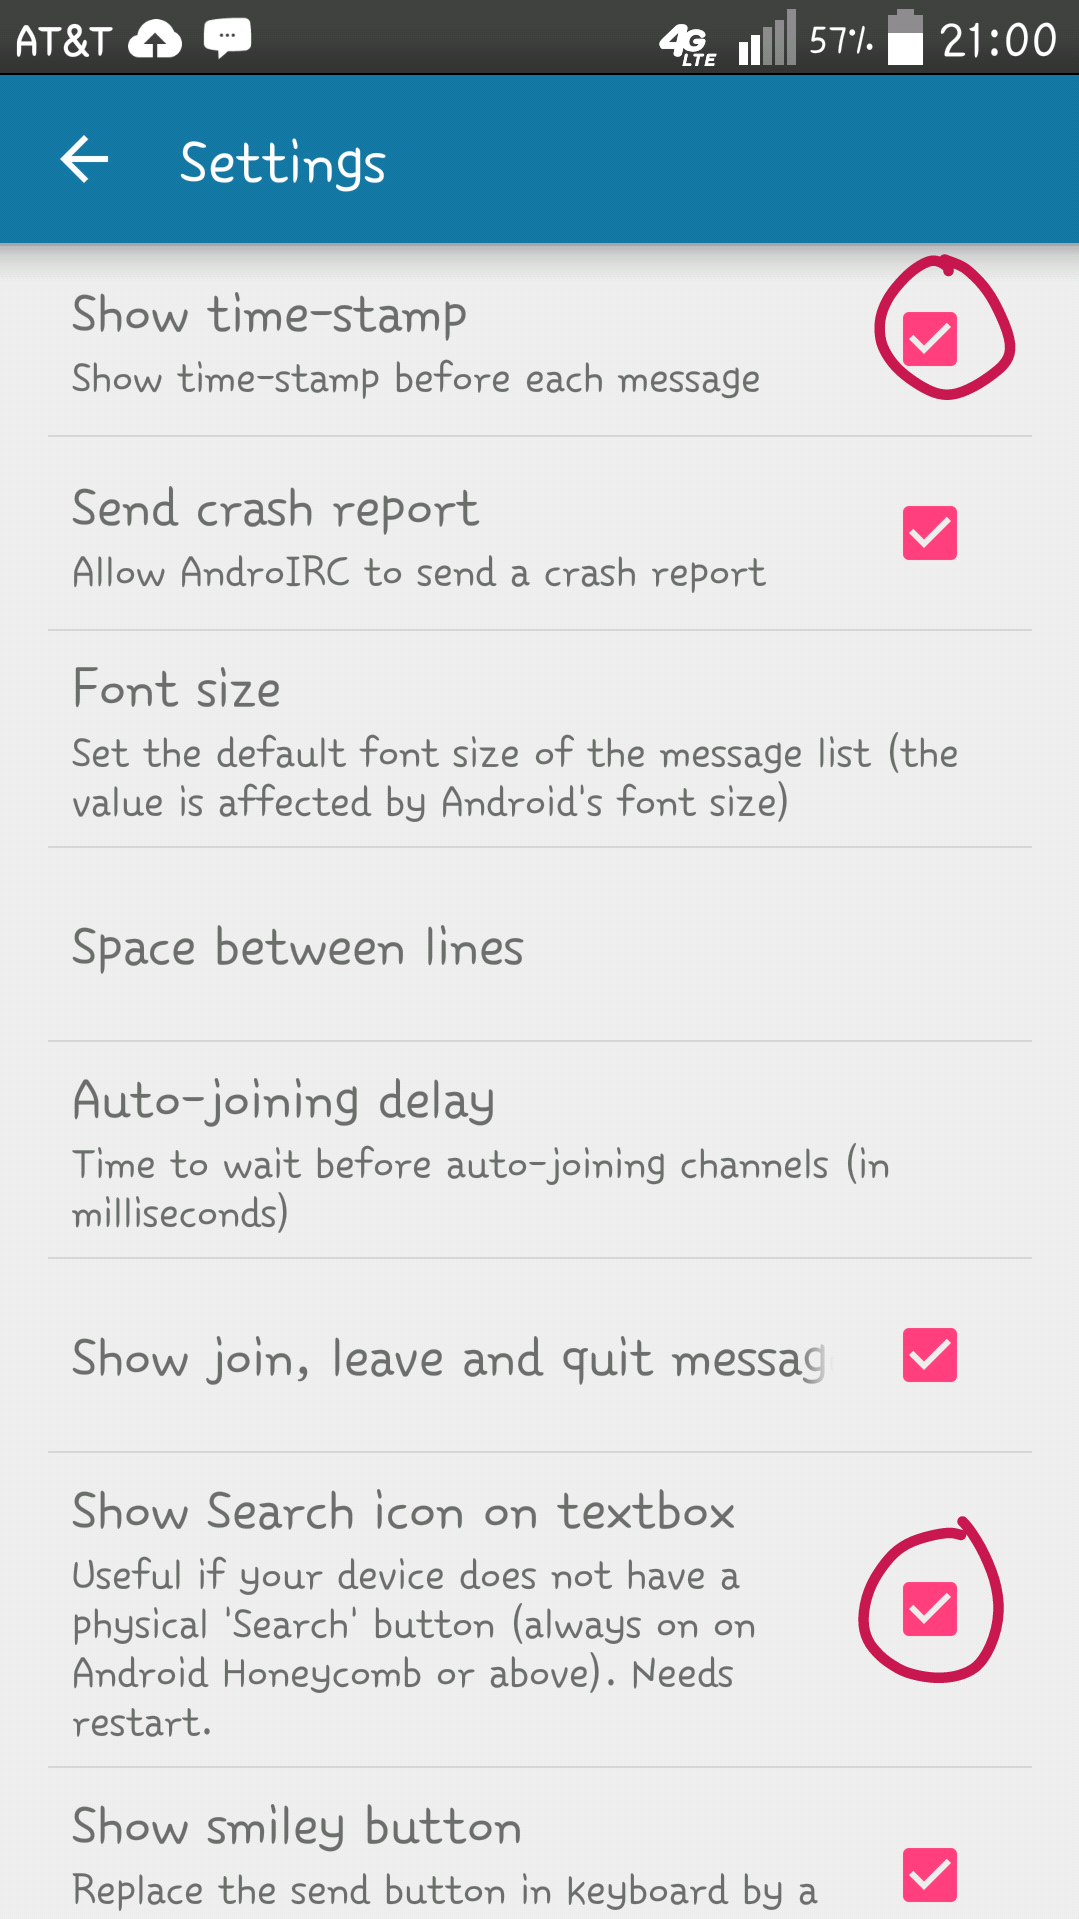 Additional Optional Settings[/caption]
These aren’t mandatory, but highly suggested, particularly if you’re used to using a normal irc client.
- Show timestamps: This is quite handy for pasting lines if needed as its automatically included. [hint: long-press on a line to copy it to the clipboard]
- Show Search icon on textbox: Newer Android devices no longer have the find button, so this adds the magnifying glass to the left edge of the textbox; just type the first couple characters of a nick and tap this to complete it.
- Notifications: There are a few different options here depending on various things such as new queries or highlights.
- Theme: If you’re used to a dark background for IRCing, its available here.
And that’s all there is for setup! Now to connect from the main screen, just tap the plus icon and select the server from the list. Feel free to stop by #help if needed as a few of us use this client on a regular basis.